Windows 10 technical preview image has been on the internet for some time now. Some of you want to install it but are worrying about the bugs and all since it's not the final build. But don't worry that's why virtual machines exist. It allows you to run any OS just like any other application that you run on your current OS.
Step 3: Install VirtualBox. It's simple click next .. next and you'll be done.
.png)
.png)
.png)
.png)
.png)
.png)
.png)
Step 12: Now the Hard Drive space has been allocated. If you followed the above mentioned steps correctly you should see a windows like this.
.png)
.png)
.png)
.png)
.png)
.png)
.png)
.png)
.png)
.png)
.png)
.png)
.png)
.png)
.png)
.png)
.png)
.png)
.png)
.png)
.png)
.png)
.png)
.png)
.png)
.png)
.png)
.png)
.png)
I hope you liked my tutorial, if it was useful I would be glad if you could share it, give my YouTube video a hit on the like button and make sure you hit the subscribe button to get everything latest on technology.
I you have any questions or thoughts you could leave them down below in the comment section either here on my YouTube channel.
Thanks and Enjoy :)
I prefer VirtualBox by Oracle but there are other options such as VMWare etc. In this Tutorial i'll be teaching you how to install Windows 10 on VirtualBox so I suggest you download it.
Things we need:
1) A desktop/laptop with decent specifications.
2) VirtualBox by Oracle - download
3) Windows 10 Technical Preview image file - download
Video: Steps To Install:
You can find the written instruction below:
Step1: Download VirtualBox from Oracle (Link above)
Step2: Download Windows 10. Sign up for the Windows Insider program.
Step 4: Once the Windows 10 image has been downloaded. Save it somewhere you'll find it easily. I saved it on the Desktop. So after the installation of VirtualBox and saving the image file, run VirtualBox by Oracle.
It should look like this
.png)
Step 5: Now click on New to create a new virtual machine that will run your OS. Give it any name, here we will give it "Windows 10" and then select "Windows 8.1 (64 bit)" in version and click Next.
Step 6: Now select the desired amount of RAM you want to give to your new Virtual Machine and click Next.
Note: At least 2GB RAM is needed so either you can assign more than 2GB but it should be 2GB minimum.
Step 7: Now select Create a Virtual Hard Drive Now option and click Create
Step 8: Now select VDI (VirtualBox Disk Image) option and click Next.
Step 9: Now select Fixed Size instead of Dynamically Allocated and click Next.
Step 10: Now select the desired amount of hard drive space you want to allocate to your new machine. You need to allocate a minimum of 25GBs but you can allocate even more (as per your need). I'm allocating approximately 28GBs here. Now click Create.
Step 11: Now the Virtual Machine will be allocated the hard drive. This process will take some time so wait for it to complete.
Step 12: Now the Hard Drive space has been allocated. If you followed the above mentioned steps correctly you should see a windows like this.
This means that your Virtual Machine has been created successfully but it's not yet ready to run Windows 10 or the desired OS. Just a few more steps and you'll be running Windows 10 in no time.
Step 13: Now press the 'Settings' button which is located right next to the 'New' button and the settings menu should open up.
Step 14: Open the "System" option in the settings. It's located at 2nd position on the left hand side list. Now select "Enable I/O APIC" option and open the Processor tab.
Now make sure that "Enable PAE/NX" is selected and then open the Acceleration Tab.
In the Acceleration tab select both the acceleration options and then select the "Storage" option which is positioned 4th on the left hand side along with the other settings
Step 15: Once you are in the Storage menu, select "Empty" [This step is done to load the image file which contains the OS]
Now navigate to the location where you save the downloaded Windows 10 image file and click OK.
Step 16: With the above steps you are all set now. All you need to do now is click "Start"
Step 17: Congratulations!! Windows 10 should be loaded and the installation process should start now.
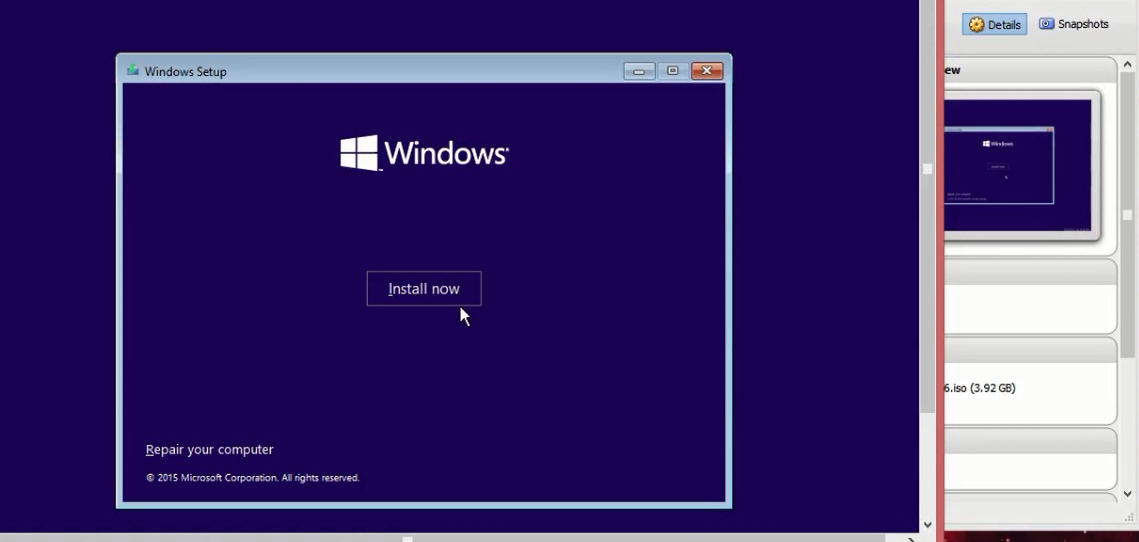
Step 18: You should see a Blue screen asking you about your language preference, keyboard layout etc. Once you are done selecting click "Next" and then "Install Now" on the next screen
Step 19: Read the Terms and Conditions and mark the "I accept the license terms" and click Next
Step 20: Now select the "Custom: Install Windows Only (Advanced)" option. Make sure you select that option.
Step 21: You should now be seeing the Virtual Hard Drive that we created with 28GB storage. Now simply click "Next"
Step 22: Windows should start installing now. This process takes some time, it'll restart a few times. So you could go get something to drink in the mean time.
Step 23: Windows will request you to restart. You can either click the "Restart Now" option or let windows do it automatically. The image will be loaded automatically, you can enjoy your drink till then.
Step 24: After the restart windows should now show the message "Getting Ready"
Step 25: Now you should select the "Use Express Settings" option on the following screen.
Step 26: Windows will now ask you for your login details. Enter the username and password that you used to sign up for the Windows Insider program.
Step 27: You will now see a message stating "Finalizing You Settings"
Step 28: Voila!! You have installed Windows 10 successfully on VirtualBox. Windows should greet you with "Hi" and all you need to do is enjoy the animations and let windows complete the background processing of different applications and that's it.
Congratulations!!!You should now be running Windows 10 on VirutalBox.
Here are a few Windows 10 screenshots:
Here are a few Windows 10 screenshots:
I hope you liked my tutorial, if it was useful I would be glad if you could share it, give my YouTube video a hit on the like button and make sure you hit the subscribe button to get everything latest on technology.
I you have any questions or thoughts you could leave them down below in the comment section either here on my YouTube channel.
Thanks and Enjoy :)


.png)
How To Install Windows 10 Tech Preview on VirtualBox